
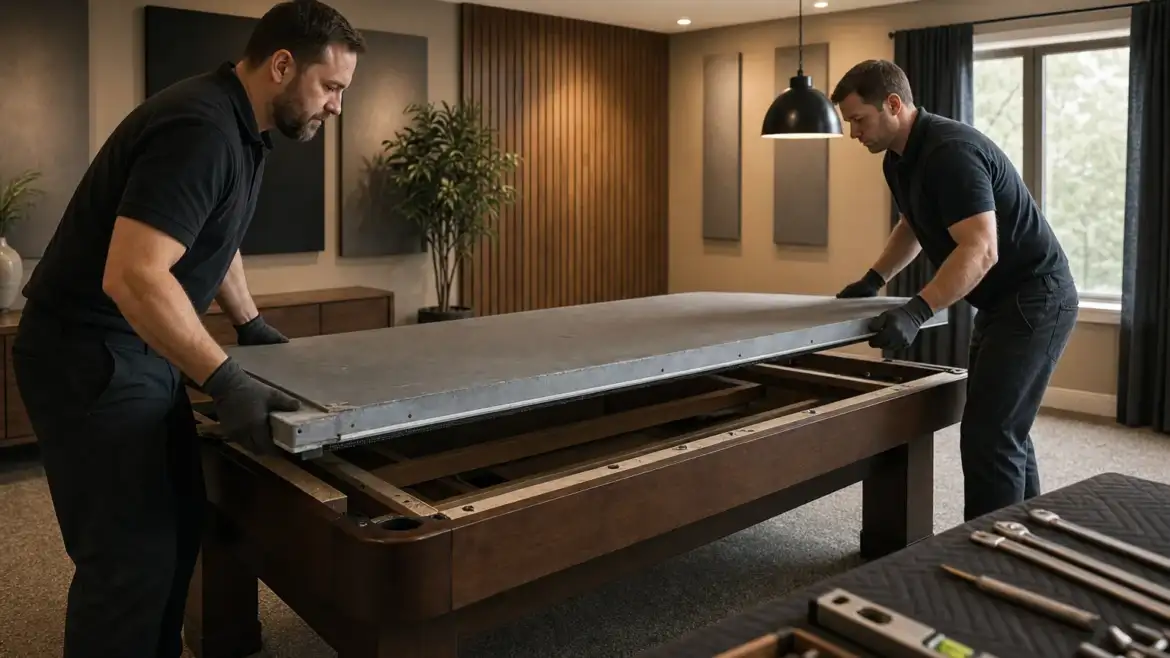
Knowing how to disassemble a pool table correctly can save you money, protect your investment, and make moving or storage far less stressful. Whether you’re relocating to a new home, renovating your game room, or storing your table temporarily, taking apart a pool table the right way is critical. A single mistake during disassembly can damage the slate bed, bend rails, or strip screw holes, turning what should be a straightforward project into a costly repair.
This guide walks you through the disassembly process step by step so you understand what’s involved and can decide whether this is a DIY job or one best left to professionals.
Why Proper Disassembly Matters
Pool tables are precision instruments. The slate playing surface, cushions, rails, and frame must all work together to create a true, level playing field. When you disassemble a table incorrectly, you risk:
- Cracking or splitting the slate bed
- Damaging the felt or cloth
- Bending or warping the rail structure
- Stripping screw holes in the frame
- Misaligning cushion rails
- Breaking fasteners that are difficult to replace
A pool table that played perfectly before disassembly can become unplayable if corners are cut. Even experienced do-it-yourselfers sometimes discover mid-project that a particular component requires specialized knowledge or tools to remove safely.
Tools and Materials You’ll Need
Before you start, gather the right equipment. Using incorrect tools can slip and cause damage.
- Socket set and wrenches (various sizes)
- Screwdrivers (Phillips and flathead)
- Power drill (optional but helpful for certain fasteners)
- Level (to check for leveling before and after)
- Rubber mallet (for gentle persuasion, not force)
- Moving blankets and packing material
- Labeled boxes or bags for small fasteners
- Work gloves and safety glasses
- Plastic sheeting or tarps for protection
- Dolly or furniture cart for moving the slate
Keep all small parts, screws, bolts, and rail segments organized and clearly labeled. Losing fasteners can delay reassembly and may require custom replacements.
Step-by-Step Disassembly Process
Remove the Felt or Cloth
Start from the top. The felt layer sits on top of the slate bed and is stapled or glued to the underside of the rails. Carefully remove any corner pockets if they’re separate pieces. Gently lift one edge of the felt and peel it back, removing staples as you go. Use a staple remover or flat pry bar. Work slowly to avoid tearing the felt if you plan to reuse it.
If the felt is damaged or you’re not keeping it, removal is more forgiving. Still, be careful not to gouge the slate underneath.
Disconnect the Rail Cushions
Once the felt is removed, you’ll see the rail assembly. Modern tables typically have cushions attached with bolts or screws underneath the slate. Locate these fasteners and remove them carefully. Some tables have cushions glued in addition to being bolted. In those cases, you may need to carefully cut the adhesive with a utility knife before attempting to separate the rail.
Label each rail segment so you remember its correct position during reassembly. The head, foot, and side rails all fit together in a specific way.
Remove the Slate Bed
This is the most critical and physically demanding step. The slate is heavy, fragile, and usually rests on a bed of felt or wool underlayment. Most tables use bolts or screws underneath the frame to anchor the slate. Remove these fasteners from below.
You may need to lift the slate slightly to access some fasteners. Use a rubber mallet and wooden block to gently tap around the edges if the slate is stuck. Do not pry aggressively or strike the slate itself.
Once fasteners are removed, you’ll need at least two people to carefully lift and support the slate. Slate can crack under its own weight if edges are unsupported. Slide the slate onto a dolly or have two people hold it level and parallel to the ground as you move it.
For three-piece slate beds, which are common, you may need to separate the sections. Do this carefully and keep the seams aligned with shims or spacers so they remain flat if stored for an extended period.
Disconnect the Frame and Legs
With the slate removed, you can now access the frame bolts and leg fasteners. The frame typically bolts together at the corners. Remove these bolts and keep them organized by location. Some tables have adjustable leg levelers. Turn these until the legs are completely loose, then unscrew them from the frame.
If your table has a matching slate bed cover or storage case, this is a good time to make sure you have all the components before moving on.
Storage Tips to Protect Your Table
Once disassembled, proper storage protects your investment from damage.
Climate Control: Store the slate in a climate-controlled environment. Extreme temperature swings and humidity changes can cause the slate to shift, warp the frame, or affect the felt. Avoid damp basements, unheated garages, or outdoor storage.
Vertical Storage: Never store a slate bed flat on the ground for extended periods. The weight can warp or crack it. Stand slate pieces vertically against a wall, supported by wooden blocks and padding. Keep pieces level to prevent stress on any single point.
Support the Frame: Store the frame upright or lay it flat on a padded surface. Do not rest the frame on concrete without protection, as this can damage the wood and fastener holes.
Protect the Felt: If you’re reusing the felt, roll it loosely and store it in a dry place away from moisture, pests, and direct sunlight. Do not fold it, as creases are difficult to remove.
Organize Fasteners: Keep all bolts, screws, rail cushions, corner pockets, and other components in labeled boxes. Take photos before disassembly so you can reference the assembly layout later.
Cover Everything: Wrap disassembled parts in moving blankets or plastic sheeting to protect against dust and accidental damage.
When to Call a Professional
Disassembling and storing a pool table is manageable if you’re handy and careful, but it involves physical risk and real consequences for mistakes. If your table is valuable, vintage, or made of premium materials, professional disassembly and storage may be the smarter choice.
DFW Billiard Professionals offers professional pool table setup and disassembly services throughout the Dallas-Fort Worth area. The team handles everything from disassembly through protective storage and reassembly, ensuring your table remains level and playable when you’re ready to set it up again. This is especially important for high-end or tournament-grade tables where precision matters.
Reassembly Requires the Same Care
Remember that disassembly is only half the challenge. Reassembly must be done in reverse order and with the same attention to detail. If you find that disassembly revealed issues you weren’t aware of, or if you’re uncertain about any step, it’s worth consulting professionals before you put the table back together.
Proper disassembly and storage protect your pool table’s playability, appearance, and lifespan. Take your time, stay organized, and when in doubt, reach out to experienced table mechanics who can guide you through the process.